Guide to Creating Azure VMs with Terraform

VM OS Disk Settings
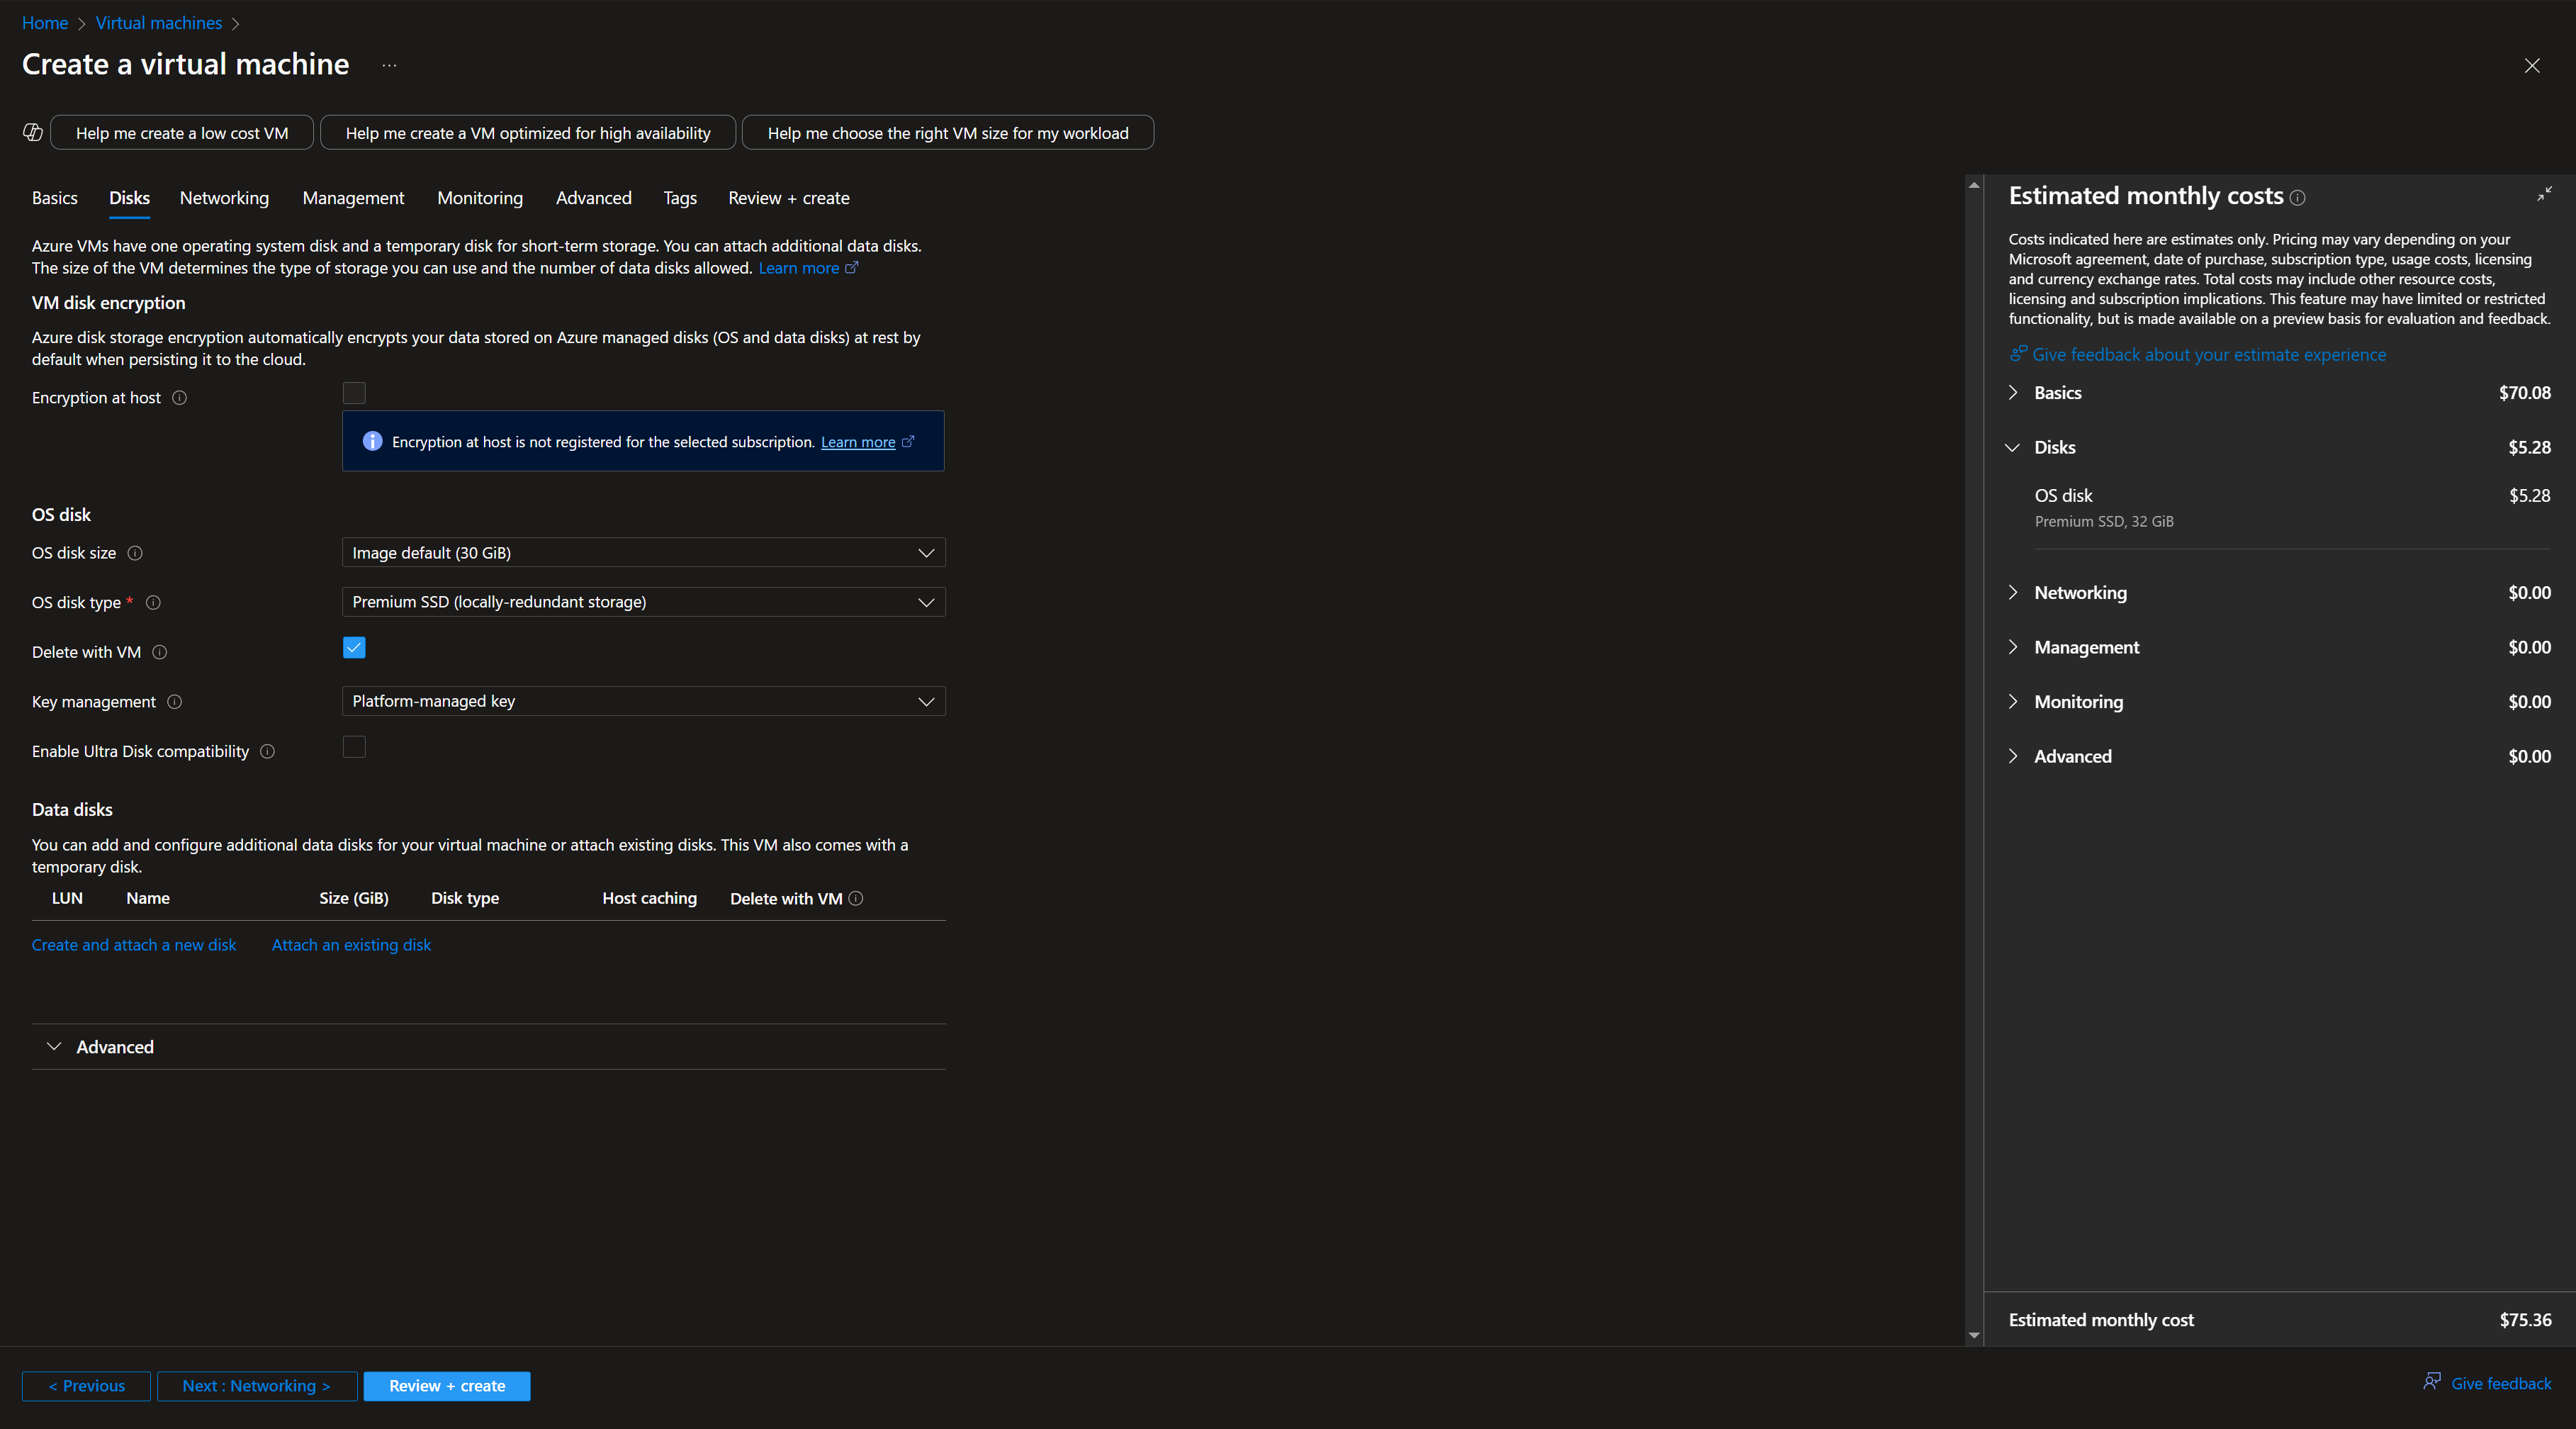
When we use Terraform to create a VM, we find that the os_disk block is required. In practice, this corresponds to the Disk section in the Azure Portal interface for creating a virtual machine.
According to this Terraform article: azurerm_linux_virtual_machine | Resources | hashicorp/azurerm | Terraform | Terraform Registry
This os_disk block has two required fields: caching and storage_account_type.
Caching
In the Azure Portal, caching refers to Host caching.
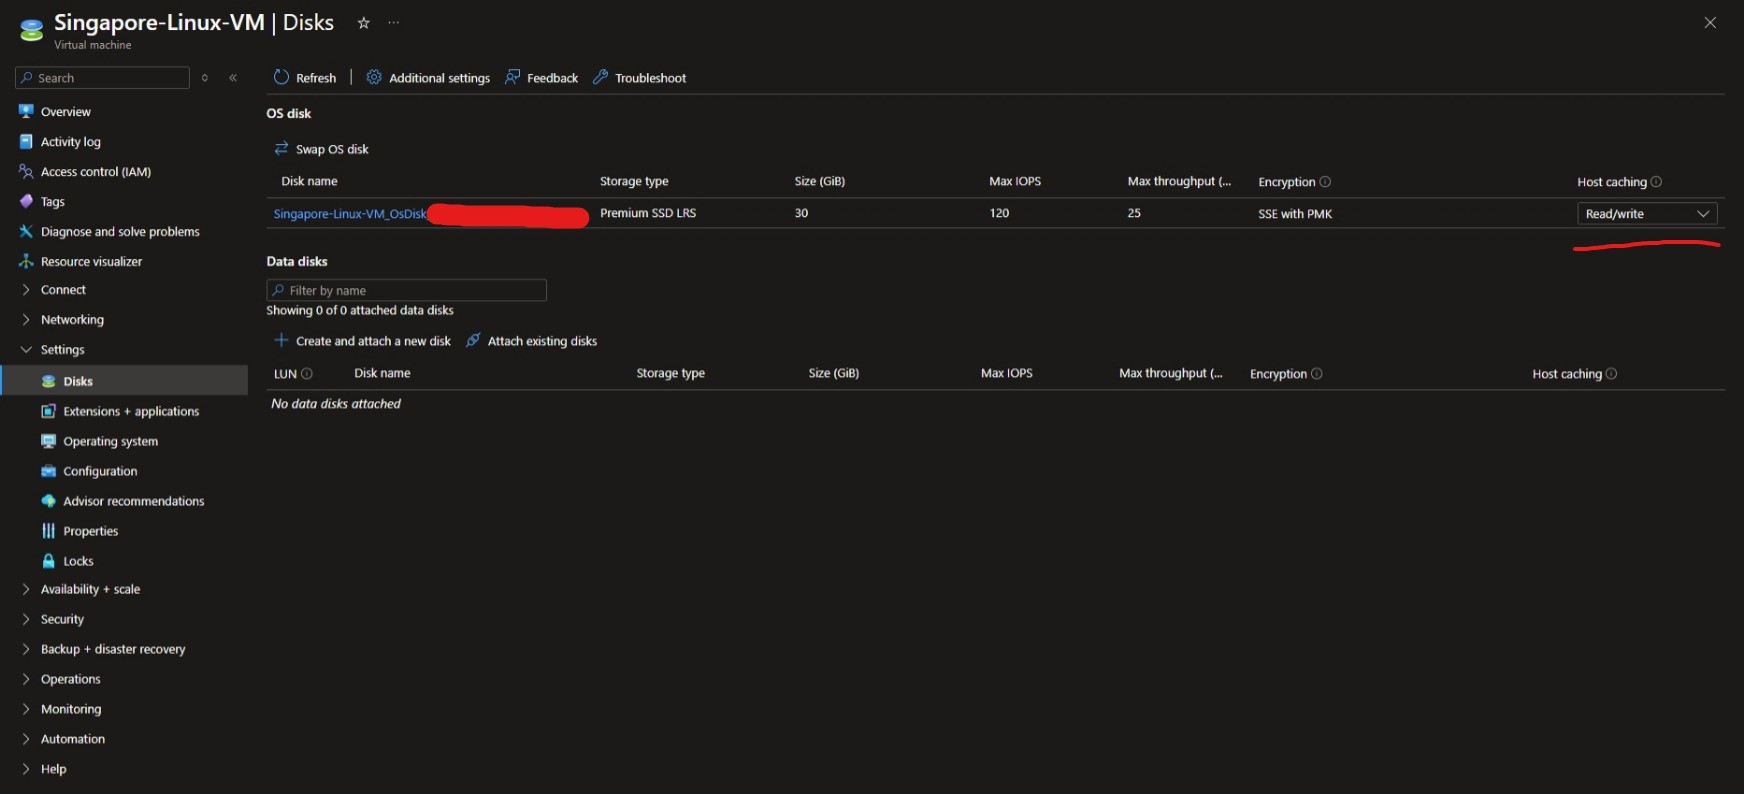
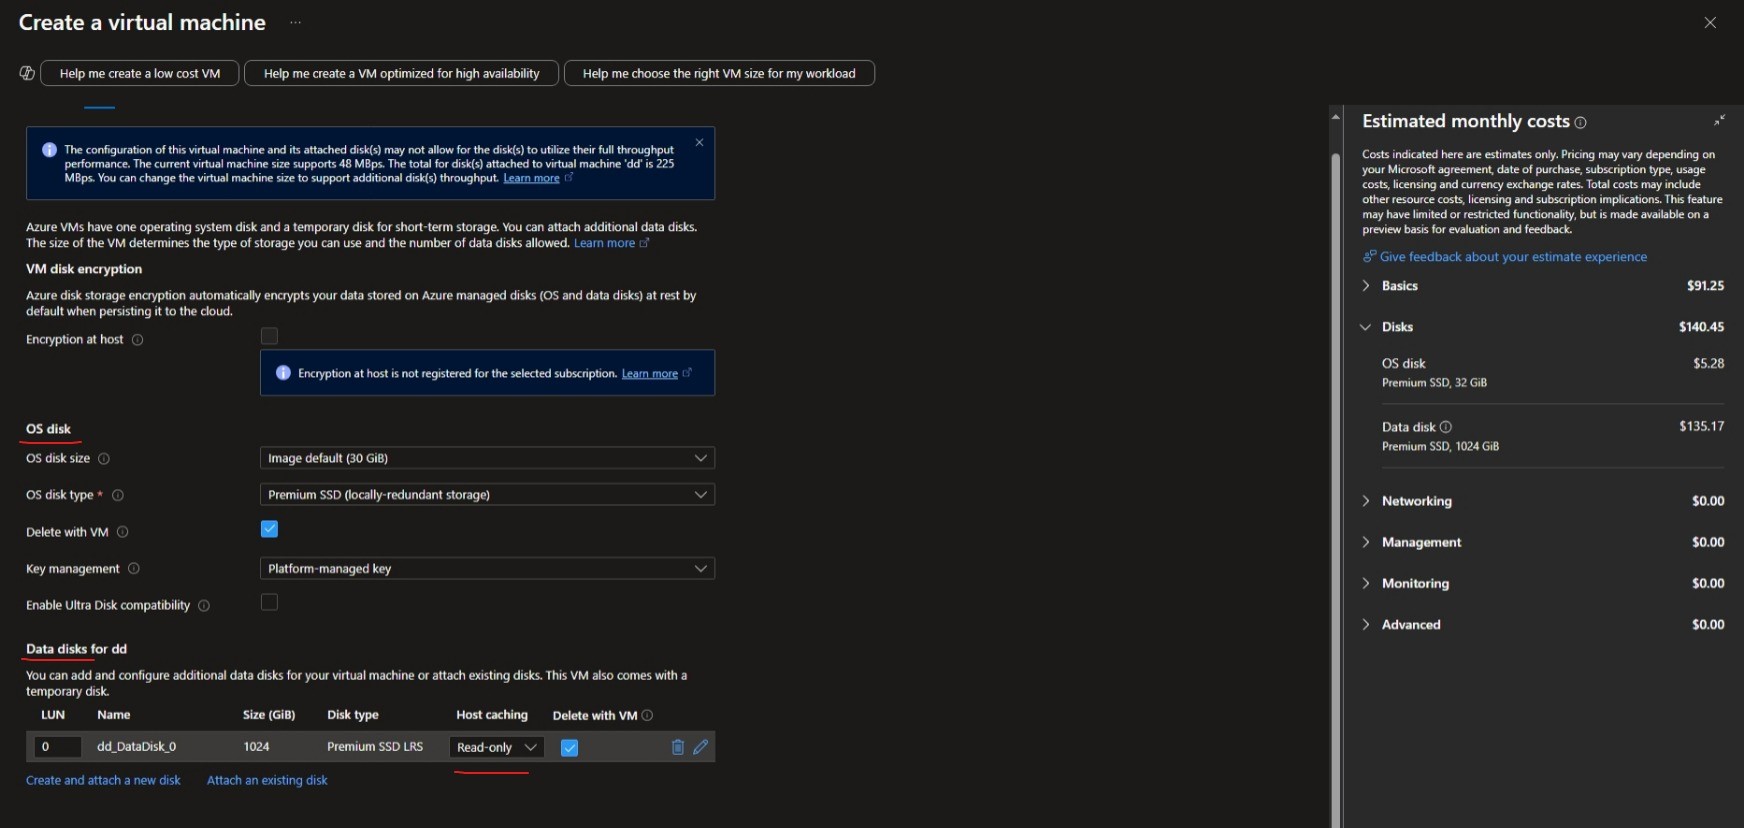
When creating an Azure VM in the Portal, caching for the OS disk cannot be specified, but it can be specified for data disks.
For more details about Azure VM disks, see this document.
To summarize the differences between the three options in one sentence:
- ReadOnly: Caching accelerates reads only, not writes.
- ReadWrite: Caching accelerates both reads and writes, but comes with risk.
- None: No caching, slower but more stable.
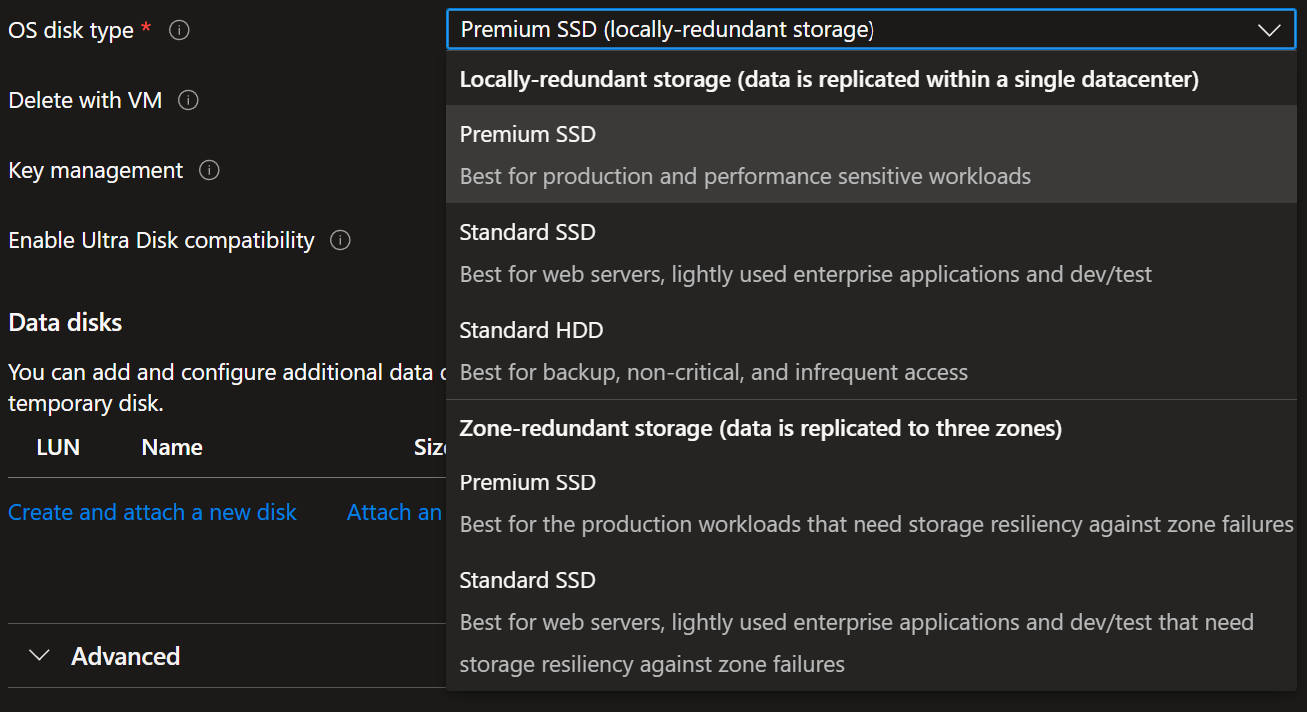
Storage Account Type
As for stroage_account_type, it actually refers to the OS disk type.
storage_account_type- (Required) The Type of Storage Account which should back this the Internal OS Disk. Possible values areStandard_LRS,StandardSSD_LRS,Premium_LRS,StandardSSD_ZRSandPremium_ZRS. Changing this forces a new resource to be created.
Here, LRS stands for locally redundant storage, and ZRS stands for zone-redundant storage.
About the Default Disk Size
Because we did not explicitly set disk_size_gb, the default size will be used.
In Azure, when you create a virtual machine without specifying the size of the operating system disk (OS Disk), the default size is:
- Linux virtual machine: 30 GB
- Windows virtual machine: 127 GB
In practice, though, the default size generally feels sufficient for both Linux and Windows.
VM Image
In Azure Terraform, an image is identified by four properties:
1 2 3 4 5 6 | |
To obtain these four properties, you can use the command az vm image list --output table, which shows some of the most commonly selected images.

If you want to see all images, you need to add the --all parameter:
1 | |
However, this command takes a very, very long time to run, far longer than a normal person would want to wait.
You can also use this site, Azure VM Image List, to view all images. Under the hood it is still running this command, but it is much faster.
There is also a reverse approach: you can extract this information from an Azure VM that has already been created.
Using the az command:
1 | |
output like
1 2 3 4 5 6 7 8 9 10 | |
You can extract the relevant information from this.
Marketplace
You can go to Azure Marketplace to see some basic information, such as the publisher ID and product ID, although the capitalization of the two may not exactly match.
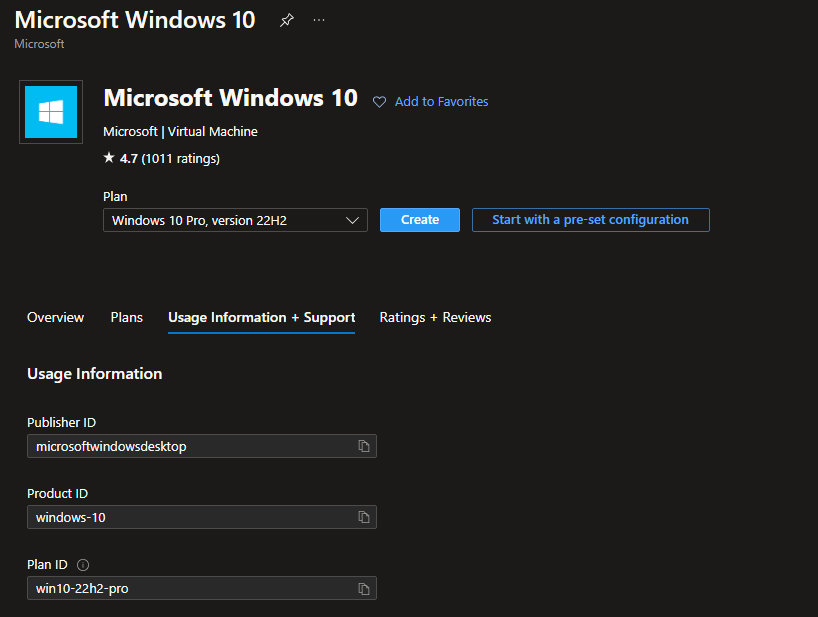
You can also search for certain keywords on the Azure VM Image List website, and combine that with Grok 3.
ARM Template
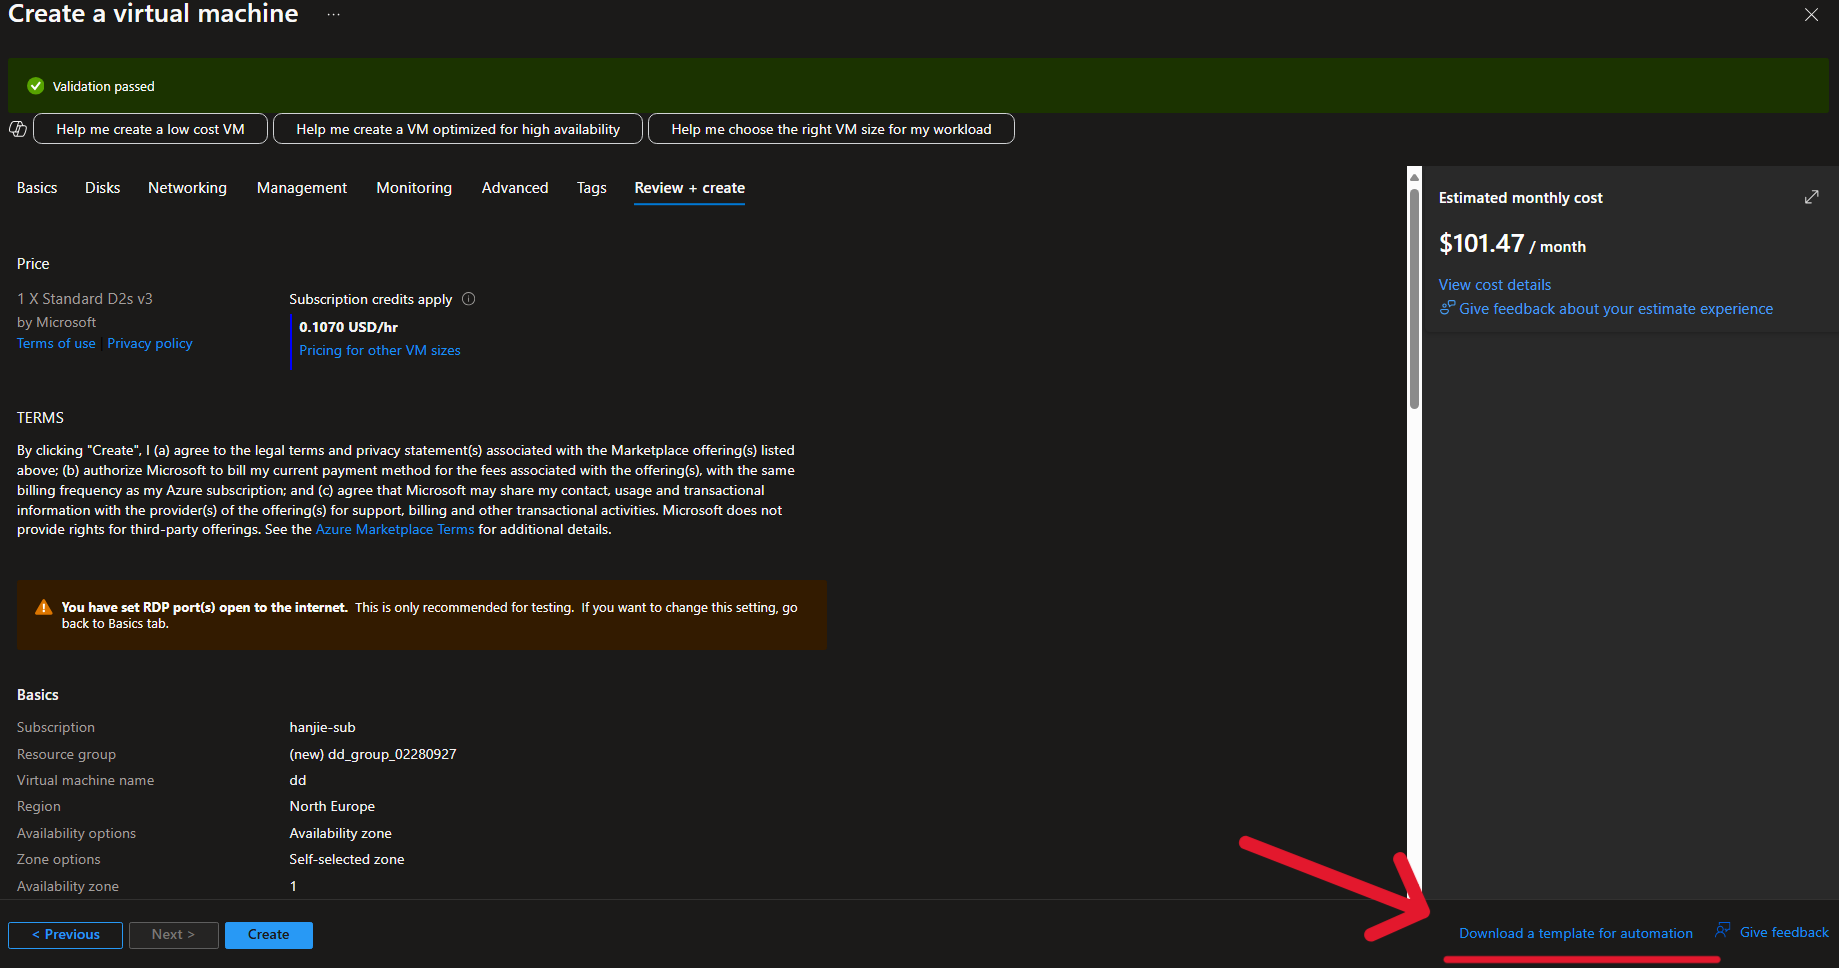
You do not need to actually create the VM. You only need to proceed to the Review page, where you will see Download a template for automation in the lower-right corner. Click it to continue.
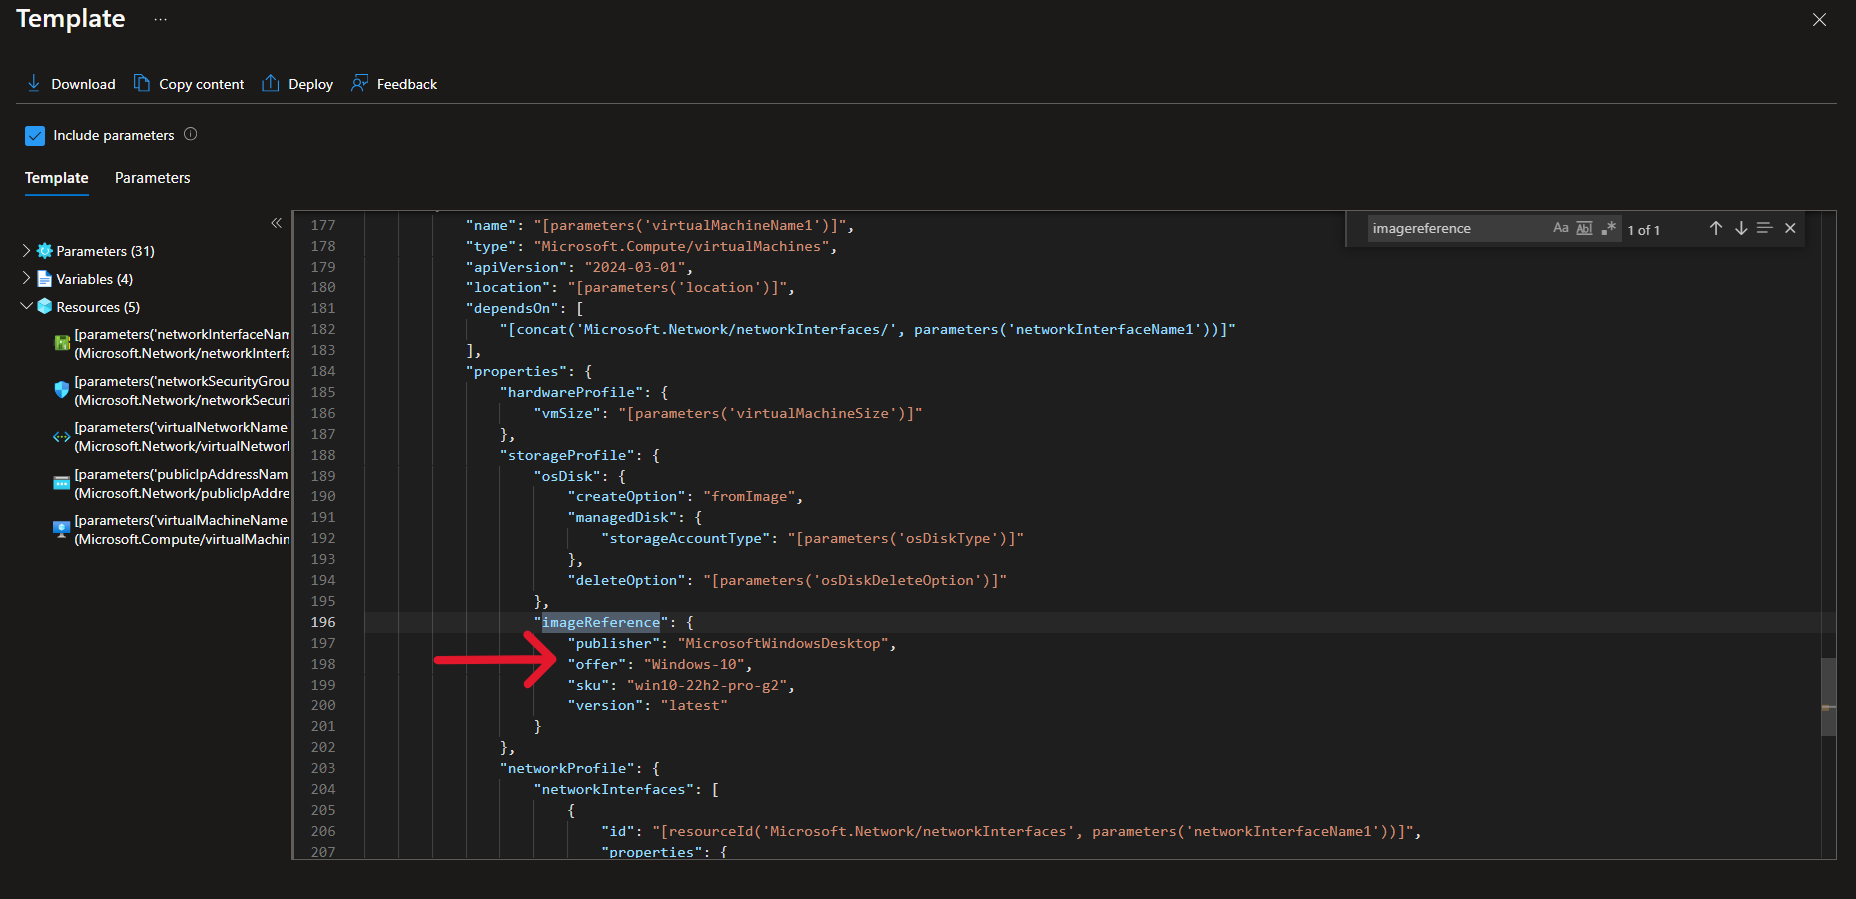
On that page, simply press Ctrl + F and search for imagereference, and you will find it.
VM Size
You can refer to this document.
Windows Virtual Machine
azurerm_windows_virtual_machine | Resources | hashicorp/azurerm | Terraform | Terraform Registry
There is one more thing to note about Windows VMs: if you do not explicitly set compute_name, it will default to the value provided in name.
computer_name- (Optional) Specifies the Hostname which should be used for this Virtual Machine. If unspecified this defaults to the value for thenamefield. If the value of thenamefield is not a validcomputer_name, then you must specifycomputer_name. Changing this forces a new resource to be created.
However, because Windows limits computer names (NetBIOS names) to 15 characters, which is a historical convention inherited from NetBIOS and early Windows networking protocols, if you do not configure compute_name and your name exceeds 15 characters, you will get the following error:
1 | |